Wednesday, December 17, 2014

Hey, I just had a great idea!! How about a give away! I will pick, at random, a name from the comments. And this is the give away gem!! Good luck!!

Merry Christmas,
Becci
Hey Bloggerland,

     Time has slipped away........again.......and it is Christmas time. So now my brain is 
trying to switch from fall leaves to evergreens and carols. I'm having a hard time with
the switch so to get me in the mood I thought I would dye and crinkle some seam binding
ribbon. This little bit of "wonder ribbon" is sooooo easy to dye and crinkle that it will make
any Scrooge out there merry and bright.

First, you need to get a few supplies together.
Distress Dye, Mister bottle, stylus, heat gun, and the star, seam binding ribbon. You can
the first four items at your local craft store and the seam binding ribbon at Zipperstop.com.
                         
                         
 Next, cut the length you need and run the Distress Dye down the length of the ribbon.                                      
                                   
 Now, wad up that bit of ribbon. If you want it a little lighter spray with water and dab with a
 towel.


 Next, stab that little wad with a stylus and dry with a heat gun and unravel and enjoy.


Now unravel and enjoy!! If you don't want color just spritz with water, wad, and dry!!


Ya know, this bit of goodness can be added to an ornament, tag, card, and even a present!

Now go create!!

Becci 
                                   

Tuesday, October 14, 2014

Drum roll please!!! The lucky winner of the Halloween Treat Cone is Lisa!! And a big thank you to all who commented!!

Monday, October 6, 2014

Give Away Time!!!!

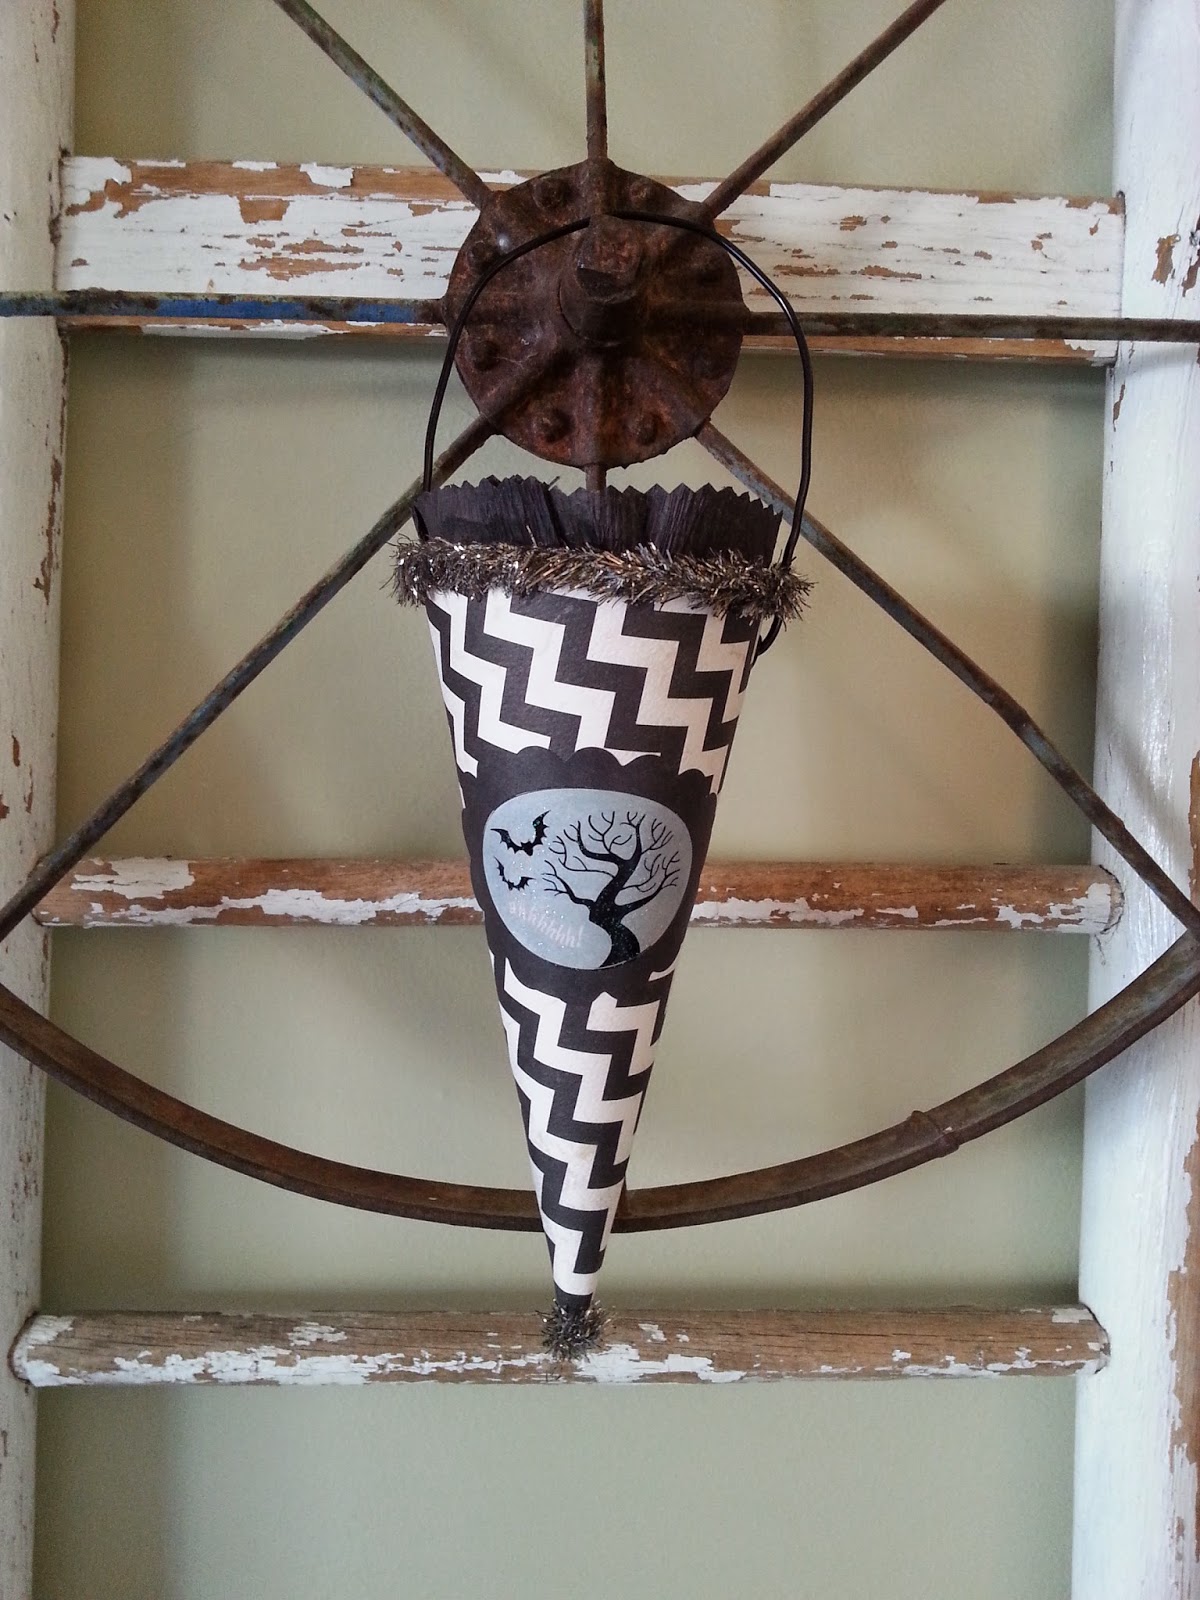
Whilst drinking my Diet Dr. Pepper this morning, I was hit..BAM..by a great idea to have a give away! One lucky Halloween lovin guy or gal will be drawn at random, and the prize is this darling vintage inspired Halloween treat cone. It can hang on a Halloween tree or door knob or filled with goodies! Good luck and may the ghouls be with you!

Thursday, October 2, 2014

Hey Bloggerland,
     As I was sipping on my morning Diet Dr. Pepper, I had a thought. I have a bunch of those rattling around in my skull from time to time and I thought I would share this one. It's like this, ya know 
when you see something all dolled up or some creation you would like to do and make your own,
but you don't know were to go to procure those little gems of art/crafty goodness? Well. I would like to share some of my favorite haunts that I like to visit to get inspiration and goodies. 
Here goes........AlphaStamps.com, RetroCafeArt.com. These two online shops are full of collage and mixed media nirvana!! You can even pick up a few vintage items as well. BlueMoonScrapbooking.com, MarcosPaper.com. These two gems are chuck full of anything you could want with Tim Holtz, Sizzix, Spellbinders, and much more! If you are not familiar with Tim Holtz and his products check out his site at TimHoltz.com. RangerInk.com is a site that is jammed
with everything from inks to texture paste. They even have tutorials to give you inspiration on how to use the different products they sell. Last but definitely not least are the estate and garage sales! You can pick up a slue, a peck, and a heap of wonderful vintage items ( or as my better half says..Junk..)
at a great price. I hope these great sites will inspire you to unleash your inner artist!
Now go create something!

Becci

Wednesday, September 24, 2014

How do Blogotopia? It's been a long hot summer and a  vacation since I have hit Blog Land and
Halloween is upon us! It happens to be my favorite holiday. So I thought I would start off the
Halloween season with a bit of decor..........vintage inspired candy cones. They can hold candy
and so much more. You could put in spiders, skeleton hands, tinsel shreds, the list goes on.
I think I would prefer candy corn! Nothin' says Halloween is in the air more than candy corn!!
So, here goes..........fist you need a paper mache cone. The size I used was a 7"x 3" cone. Now we
gotta dress the naked thing up!! So, pick out some paper that screams Halloween, put the corner of the cone in a corner of your paper and wrap the paper around the cone and mark the paper where it meets the opening of the cone.


Now, cut the paper and inch above the pencil mark you made. To attach these two together I used       
double sided tape. I ran it down both edges and just under the pencil mark. Mod Podge or one of your favorite adhesives could be used, but I'm a bit impatient so, I go for double sided tape. Next, wrap       that baby up and burnish the seams with a bone folder or the back of a spoon.  Cut one inch sections   and hot glue the sections to inside of cone opening.                                                                                      

 Now you are ready to doll your cone up. I add a sticker and some vintage style tinsel to the top and the tip of the cone.

I also added a bit of crepe paper to the inside of the top and trimmed it with pinking sheers. Next, I added black eyelets to each side and wire for hanging. I also add a bit of shimmer to the sticker with
some Liquitex Artist Color in Opal. But you can also use glitter glue.


 Now you are ready to fill with goodies and hang on a Halloween Tree or give as a treat to your favorite people! Now go and create!!!!!!   Becci


Wednesday, July 16, 2014

Hey Blogger Land,

It's hot and sunny along the Wasatch Front! So, today I thought I would show ya'll a tutorial on image
transfers. They are a great way to layer and can be used on any project big or small!!
This tutorial will be dealing with Matte Medium transfers. There are a TON of ways to do an
image transfer, but using Matte Medium is my fav! (If you don't have Matte Medium you can use
Mod Podge.) So, here we go.........The first thing you will need is a laser printer image. Ink jet images
don't work well with transferring. So, haul your buns down to the copy shop and copy away.
Next find a fun substrate to make the transfer on. Then you will need a bone folder, a misting water bottle,
sand paper, and last but not least, Matte Medium or Mod Podge.

Now you will need to brush the Matte Medium or Mod Podge on the substrate and on the image.

.
         Now put the image on the substrate and burnish with a bone folder or the back of a spoon.
Here is the part that takes the most time...drying. I'm impatient so I use a heat gun. If you want to 
use the old fashion method of natural drying, let it dry for a few hours or overnight. When it's dry sand the surface using 120 grit sand paper. Sand gently, you only want to scratch the surface.


Now squirt the sucker and let it sit for around five minutes or so. Until the paper fibers are saturated.
Then start rubbing.....gently... until the paper is off the image. You may need to squirt more water on the
image to get remaining paper off.

When there is not anymore hazy paper left on the image you are done!

Try layering vintage book pages with image transfers. The possibilities are endless. Use one, two, or more images to make a one of a kind collage. Did you know that you can use scrapbook paper to make an image transfer? Now go and create!!!!